Olive Oil (5.7) - Five Pitches - Trad - Gear Anchors
Approach: From the Pine Creek Canyon parking lot, head out on the path out of the lot toward Pine Creek Canyon. When you get to the homestead, walk about 25 feet past the old foundation and take the path that heads left toward the creek. If there's water, cross the creek (if not, just cross the dry bed), and follow the path on the other side until it starts to go uphill to the left. You'll come to a helpful sign with arrows pointing in both directions at a fork in the path; go left (even though it appears to be away from the cliff).
After a few minutes of hiking you'll come to your first obvious trail that heads up to the right (unmarked). This is the descent trail, so keep going.
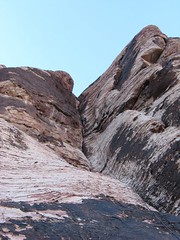
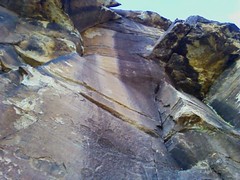
When you come to a spot where there is an obvious trail going straight (near a tree) while the main trail winds left, go straight. Follow the cairns into the gully on the left of the base of Rose Tower (look up and you'll see the ramp and final pitch of Olive Oil). Scramble up boulders on a path of least resistance, staying somewhat close to the rock, to an alcove with a chimney to the right and pock-marked black and white face to the left. The white bulge above a red streak is the crux on the first pitch.
Bring your bags up with you because the descent is a fair ways away from the start (and closer to the car if you parked in Pine Creek Canyon).

Pitch One (5.7) - 90 feet - Gear Anchor: Start just left of a wide chimney that has a pock-marked slab heading up to the left. Climb the face straight up to the tricky bulge. Climbing it on the left is easier than the right despite the holds appearing better on the right. Then climb straight up to a nice, sandy ledge

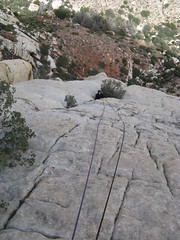
Pitch Two (5.7) - 120 feet - Gear Anchor: Head straight up, climbing the crack to the right of the corner until you come to the obvious, semi-hanging belay to the left and above the corner.

Pitch Three (5.6) - 100 feet - Gear Anchor: Climb straight up to a blocky ledge that is to the left of the right-facing corner. It may be best to belay the second (and for the leader on the next pitch) closer to where the corner is than on the more comfortable ledge to the left.
 Pitch Four (5.7) - 160 feet - Gear Anchor: Traverse right to corner, then head up the corner until you get to a long, large belay ledge that is below the chimney that makes up the final pitch
Pitch Five (5.7) - 200 feet - Gear Anchor: Head up to the squeeze chimney and climb it. A #4 Camalot is very useful just before where the going gets tough. Otherwise, without even a #3 or #3.5 you're looking at a big and dangerous fall. Plan carefully if you're wearing a backpack. I had to take mine off when I was ten feet above my last piece, and it took me ten minutes to do it due to the constriction.
 If you have 60m ropes, then climb until the chimney ends and head up right in the crack until you run out of rope. You'll probably be about 10 feet shy of the top at this point. I'm pretty sure a 70m rope will make the top. I don't remember if the placements are good on top for an anchor, though.
Descent: From the top, head straight back with the climb to your back, and fade up left to higher ground. Take care to not get too close to the edge. Turn left toward where you can see where the gully starts. Downclimb carefully two short sections to the gully. Follow the gully and the cairns back to the path that should pretty easily bring you back to the approach trail. Follow the trail back to the left, cross the creek, and turn right at the homestead back to the parking lot.
First Creek Canyon
Black Magic (5.8) - Four Pitches - Trad - Gear and Bolted Anchors
Approach: This canyon does not require payment. Drive a mile or so beyond the entrance to the Scenic Route to a parking lot with the First Creek Canyon sign (on the right). Take the path straight in for a while keeping the high ground above you and to your left. When the path gets close to the creek (after about 20min), and when you come to a section with vegetation and maybe a tree or two, take one of the paths that goes steeply, but within a short distance, up hill to the left. Follow this path to the boulder field (keeping the creek to your right). At the boulder field, head up left toward the black wall that is Lotta Balls Wall.
Black Magic is the right-hand face that starts on a boulder (with a 15 foot drop to the right) next to a left-facing corner. There are two visible bolts direclty above each other that can be seen from the ground.
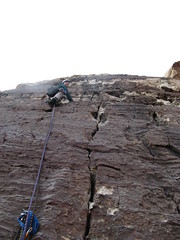
 Pitch One (5.8) - 150 feet - Gear / Thread / Single-bolt Anchor: Start on a boulder leaning against the base of the wall on the right-hand side of the wall. There will be a detached (safe to climb) flake to start on and a left-facing corner to your right if facing the start of the climb.
Climb the flake to the small corner on the right. Climb the short crack, step up, and traverse straight left past the first bolt to a good stance. High step up to the next bolt (the right-arching / right-facing corner). Use the beautiful hand rail above the bolt to traverse back right. Climb the crack up to the right straight up until you get to the single bolt and thread anchor area (it's a long way and you'll pass another bolt before you get to the anchor).
 Pitch Two (5.6) - 140 feet - Bolted Anchor: Climb the two cracks above, then the path of least resistance, fading right to about 25 feet below the headwall in a shallow pod on white rock (below a bolt that is used for the next pitch). Use the crack to build the anchor.
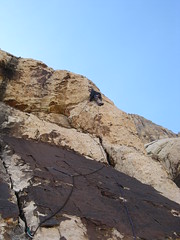
Pitch Three (5.8) - 140 feet - Gear Anchor: Step up to the bolt, then traverse directly right toward the arete (crux) on thin holds (another site recommends not going to the bolt, but heading right directly from the belay. We did not try this, but the other site said it was easier and more direct). Climb the wide crack to the left-facing / left-arching corner. High step out right and pull over the arching corner, making another traversing move to the right to find the bolt just right of a brown patch of rock (mental crux - looks much harder than it is). Climb over the bulge and fade left toward the first tree and a nice belay spot.
 Pitch Four (5.4) - 140 feet - Gear Anchor: Climb path of least resistance to the top. Don't climb directly to the top of the wall because there are no anchor spots on top. Instead, stop short of the top and belay in the corner on a nice ledge that is left of the top. My apologies for the picture looking down from above, but it should be pretty obvious what you're looking at when you're coming from below.
Descent: Walk straight back off the very top through some bushes and find the first tree rappell station on the left. Make FOUR short rappells off trees (recommended four instead of three due to the chances your rope could get caught). All stations are pretty obvious once you get to them, even if you can't see them well from the top. A 60m rope is plenty long.
After the rappells, work down through the cairns by scrambling through the large boulders (may require a little route finding, but it isn't that tough). Then make the much-easier-than-it-looks downclimb for the last 25 feet to the path. The descent trail pretty much brings you within 30 feet of the start of the climb (so no need to bring your bags up).

No comments:
Post a Comment